


Table of contents
- 1. Universal selector ( * )
- 2. Tag selector
- 3. ID selector ( #)
- 4. Class selector ( . )
- 5. Attribute selector
- 6. Chained selector
- 7. Combined selector
- 8. Inside an element
- 9. Direct child selector ( > )
- 10. Adjacent Sibling selector ( + )
- 11. General Sibling selector ( ~ )
- 12. Pseudo-class selector:
- 13. Pseudo-element selector
If you're a beginner to front end development and you know little bit of CSS, you're probably using mostly .class, #id and tag selectors, but there are way to many for you to use. Let's dive in to the article.
CSS or Cascading Style Sheets is used to describe the formatting of a document written in HTML.
CSS is often dismissed as an easy thing to learn by developers, or one thing you just pick up when you need to quickly style a webpage. Moreover, it's often learned on-the-fly.
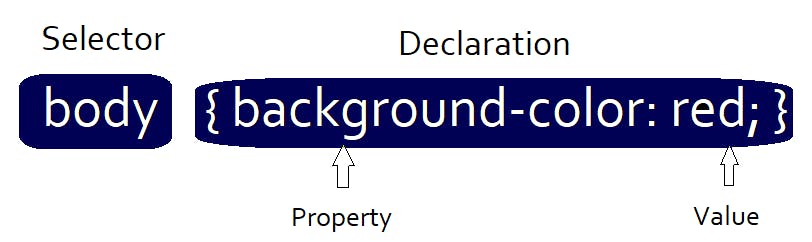
body {
    background: red;
}
This example shows CSS rule which consist of a selector and a declaration block.
CSS is understanding selectors.
Selectors are what allows you to target specific HTML elements and apply style to them.
Selectors are used to declare which part of the markup a style applies to by matching tags and attributes in the markup itself.
This article covers different types of CSS selectors and choosing the best selectors for targeting different HTML elements. So, Let's focus on selecting...

CSS selectors can be grouped into the following categories based on the type of elements they can select :
1. Universal selector ( * )
An asterisk ( * ) is used to denote a Universal CSS selector.
It selects all the elements on the webpage and apply styles to all of them.
It is often used by developers to reset margins and padding to 0. As each browser has its own 'default' CSS values for each element type. So, it is used to removes any cross-browser inconsistencies that may result from the different default CSS values.
And if you go all out, you can also reset the value of border and outline to 0. Your code will look like this:
* {
  margin: 0;
  padding: 0;
  border: 0;
  outline: 0;
}
Example:
2. Tag selector
It selects all elements by their type.
They are most useful when you're changing properties that are unique to the HTML element and where you are specifically trying to unset styles that browsers apply to certain elements.
But it is not a recommended way of selecting, as it might conflict with more specific rules.
Example:
<h1>Individual CSS Selector</h1>
<p> Lorem ipsum dolor sit amet consectetur</p>
<h3>This is a heading</h3>
<p>This is a paragraph 1</p>
<p>This is a paragraph 2</p>
p{
  color: #d1ea76;
}

3. ID selector ( #)
A hash ( # ) is used to denote an ID selector which is followed by a string of characters defined by the developer with the element/tag in the HTML document. The id should be unique for the entire webpage.
ID selectors are considered as the most powerful type of selector in terms of CSS specificity. It means id selectors beats all other types of selectors and the styles defined within wins, which sounds cool but considered not so cool because it's a good idea to have a lower specificity selectors that are easier to override when needed.
Example:
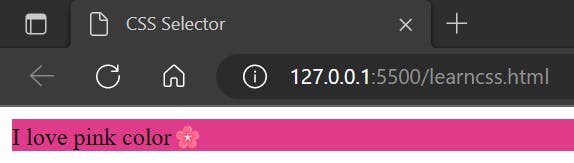
<div id="pink"> I love pink color🌸 </div>
#pink {
  background-color: #E03B8B;
}
4. Class selector ( . )
A dot ( . ) is used to denote a class selector which is followed by class name or you can say a string of characters which is defined by yourself. It is similar to ID selector but the only difference is you can use it for multiple elements in a page which share the same CSS styles.
Class selectors are considered as the most useful and versatile selectors out there. They are well supported in all browsers. You can add multiple classes on a HTML element just separating it by a space.
Example:
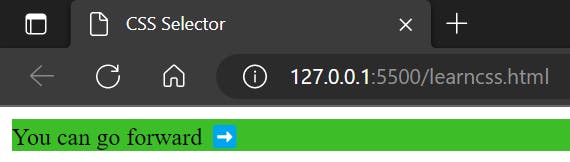
<div class="green"> You can go forward ➡️</div>
.green{
  background-color: #3DBE29;
}
5. Attribute selector
It works on HTML attributes, to select an element with a specific matching attribute.
In my point of view, attribute selectors are even more useful than classes because they have the same specificity value, and they can be any attribute, not just class. Additionally, they can have a value you can select by.
Example:
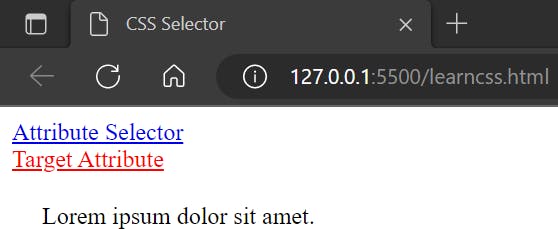
<a href="#">Attribute Selector</a>
<a href="#" target="_blank">Target Attribute</a>

<div data-para="small">Lorem ipsum dolor sit amet.</div>
a[target]{
  color: red;
}
[data-para="small"]{
    padding: 20px;
}
6. Chained selector
You can also chain selectors together. Chaining selectors are very useful when you want to select a specific element in your webpage.
You can use it while working with multiple nested elements and want to select the right element.
Example:
<li class="bg-black text-white"> Item 1 </li>
<li class="bg-black"> Item 2 </li>
li.bg-black.text-white{
  background-color: #000;
  color: #fff;
}
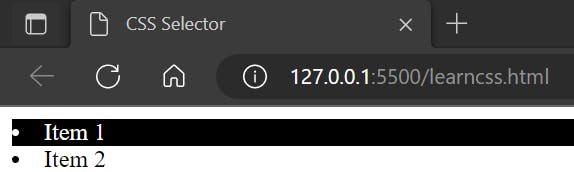
In this example, you can see that there are two list elements and CSS style has only been applied to list with 'bg-black' and 'text-white' class.
7. Combined selector
You can combine different selectors to give them common specified style definitions. So, instead of writing same properties again and again for different selectors, you can simply combine multiple selectors using ,.
Example:
<span> This is a span. </span>
<ul>
    <li>Item 1</li>
    <li>Item 2</li>
</ul>
span,li{
    background-color: burlywood;
}
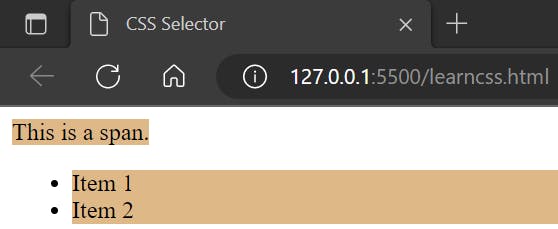
In this example, the CSS styling of burlywood background-color has been applied to both span and list which is separated by ,.
8. Inside an element
You can select an element nested inside elements, just by using a space between your selectors.
Example:
<div>
    <ul>
        <li>Item 1</li>
        <li>
            <a href="#" class="mylist">Item 2</a>
        </li>
    </ul>
</div>
div ul li .mylist{
    background-color: #E5D68A;
    color: #fff;
}
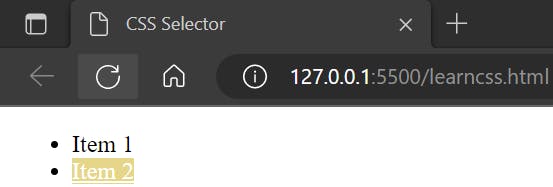
In this example, the styling has been applied to an element having 'mylist' class nested inside an unordered list which is again nested inside a div.
9. Direct child selector ( > )
It only selects the elements that are direct or immediate child of an element with specified selector.
They are pretty simple to understand, checkout below example:
<div>
    <p>1st Direct Child of div</p>
    <li>2nd Direct Child of div</li>
    <ul>
        <li>Grand Child of div</li>
    </ul>
</div>
div>li{
    background-color: #E5D68A;
}
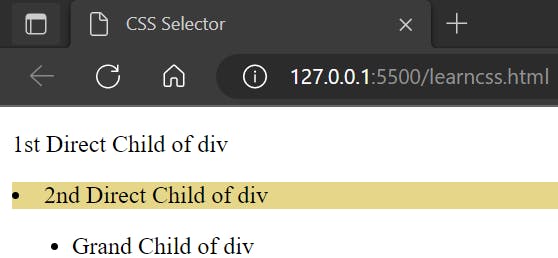
In this example, styling has only been applied to the list element that's direct child of div, not to the list element that's a grand child of div element.
10. Adjacent Sibling selector ( + )
It selects an element that immediately follows the first element.
Example:
<p>Paragraph 1</p>
<p class="sibling">Paragraph 2</p>
<p>Paragraph 3</p>
<p>Paragraph 4</p>
.sibling + p{
    background-color: #50DBB4;
}
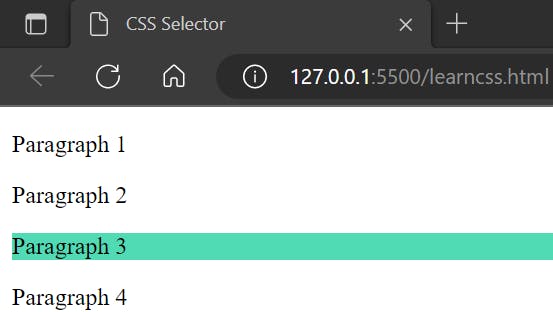
In this example, you can see that the CSS styling of has been applied to only the paragraph element element that is immediately follows the element having a 'sibling' class.
11. General Sibling selector ( ~ )
It is a Sibling selector which is almost like Adjacent Sibling selector but it will selects all elements mentioned as second element as long as they follow the first mentioned element.
Example:
<p>Paragraph 1</p>
<p class="sibling">Paragraph 2</p>
<p>Paragraph 3</p>
<p>Paragraph 4</p>
.sibling ~ p{
    background-color: #50DBB4;
}

And here in this example, it's noticeable that the CSS styling is applied to all the paragraph elements or rather siblings that follows the element having a 'sibling' class.
12. Pseudo-class selector:
Pseudo-classes are similar to regular classes in HTML however they are not directly stated within the markup, instead they are dynamically populated as a result of users actions or the document structure.
Pseudo-classes are basically just a fancy name for defining styles based on the state of specified elements. They are used in CSS selectors to permit formatting based on information that is not contained in the document tree.
They begins with the colon character :
One example of a widely used pseudo-class is :hover, which identifies content only when the user points to the visible element, usually by holding the mouse cursor over it.
Syntax for pseudo-class selector:
selector:state {
  property: value;
}
Pseudo-Class Selectors for Links:
:link- Applies styling when the element has not been visited before.:visited- Applies when the element has been visited in the current browser.:hover- Applies when the mouse pointer hovers over an element.:focus- Applies when a user has tabbed onto an element.:active- Applies when the element is selected after being clicked on and after holding down a mouse button.
a:link {
    property: value;
}

a:visited {
    property: value;
}

a:hover {
    property: value;
}

a:focus {
    property:value;
}

a:active {
    property: value;
}
Pseudo-Class Selectors for Inputs:
:focus- :focus selector you saw earlier for links is used for inputs as well.:required- selects inputs that are required.:checked- selects checkboxes or radio buttons that have been checked.:disabled- selects inputs that are disabled.
input:focus {
    property: value;
}

input:required {
    property: value;
}

input:checked {
    property:value;
}

input:disabled {
    property:value;
}
Pseudo-Class Selectors for Position
:first-child- selects the first element, which will be the first child inside the parent container.:last-child- selects the last element, which will be the last child inside the parent container.:nth-child()- selects a child element inside a container based on its position in a group of siblings. They are helpful when you want to select elements based on an expression, such as selecting even or odd elements.:first-of-type- selects elements that are the first of that specific type in the parent container.:last-of-type- selects elements that are the last of that specific type in the parent container.
a:first-child {
    property: value;
}

a:last-child {
    property: value;
}

a:nth-child(n) {
    property: value;
}

a:nth-child(even) {
    property: value;
}

p:first-of-type {
    property: value;
}

p:last-of-type {
    property: value;
}
13. Pseudo-element selector
They are used to style or select a specific part of an element.
It makes a selection that may consist of partial elements, such as :first-line or :first-letter.
They begins with double colon characters ::
Syntax for pseudo-element selector:
selector::some-pseudo-element {
  property: value;
}
::before- used to insert content before an element.::after- used to insert content at the end of an element.::first-letter- used to select the first letter of a paragraph, which is helpful when you want to style the first letter in a certain way.::first-line- used to select the first line of a paragraph.
p::before {
    property: value;
}

p::after {
    property: value;
}

p::first-letter {
    property: value;
}

p::first-line {
    property: value;
}
Hope you liked the article.

You can learn more about CSS Selectors from here: MDN Docs